Free 18" doll knotted headband tutorial

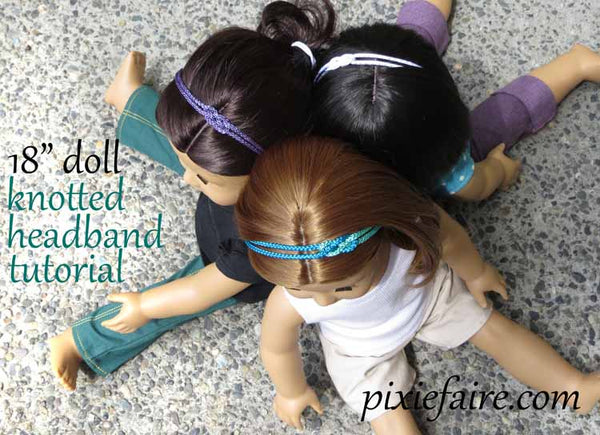
Does your doll's hair frou wardrobe need a little spicing up? This cute and easy headband might be just the ticket!

It's designed to fit any doll whose head measurement is between 11 1/2" and 12" around.

All you need is a little bit of cord, some elastic and ribbon, and a willingness to sew two tiny seams. Oh yes, and a hot glue gun :D


Any small-ish round cord will do nicely; we used a braided polyester cord as well as some rattail cording. Both are pretty easy to find... and not very expensive!

First: tie the two pieces of cord into a knot, as shown.


Once you have the knot formed, gently pull it tight, being sure to keep the cord ends even!

If you're using a sewing machine, sewing the cords and elastic all at once can be tricky. To make it easier, sew the two cords together first, then sew the elastic over top. If, on the other hand, you're hand-sewing, you should have no trouble at all!


Now it's time to give your new headband a test-run!

These work up so fast, you can make one for all your friends! Or, better yet, have a party and let all your guests make one for themselves... the options are endless!


--Melinda


24 Comments

Sandy
Sandy

August 10, 2021

I love the headbands. For anyone who wants printed direction, they are easy to print. However, be sure to indict how many pages!! Otherwise you will also print out all the comments. You can also do a copy/paste of both the directions and/or the illustrations. I prefer just a copy/paste of the project name and a finished photo of the project. Then I paste to a page with other hair accessories (each with a project name and photo). Several can be pasted on the same page. That way I can keep everything organized and refer back to the project on line when I need it. I rarely print out directions, just read on line.

Candy
Candy

August 10, 2021

Thank you for the headband instructions. It would be really nice if we could print them out and save them, so we get the under and overs in the correct places later.

debbie swanson
debbie swanson

November 05, 2019

I also macramé, so this is perfect for my small leftovers

Natalie
Natalie

March 10, 2017

These are beautiful and just what I needed. I would like to add my voice to the suggestions that these tutorials be made available in pdf format like the patterns on the website. Thank you for sharing.

Marjory W
Marjory W

March 10, 2017

This headband is very cute. When you publish these tutorials, I wish you would give a link to a PDF format, so that they can be more easily printed without everything else on the pages.

Pam
Pam

March 10, 2017

just too cute and too easy to make, Thank you

Norma
Norma

February 21, 2017

Love, love, love your video, these headbands are just adorable. Thanks

Jo Ann Little
Jo Ann Little

February 26, 2016

very cute !

Lady Di Gavura
Lady Di Gavura

February 26, 2016

Love this project of head bands. I would so appreciate it, if it could be in PDF format. That way I can download, print and have it in front of me when I am working on it. Thank you so much for the free outfits. My machine will be working overtime. Again, Thank You!!!!!

Marielisa
Marielisa

February 26, 2016

Love it!!!

Rena
Rena

February 26, 2016

Super cute! I want one for myself! You could probably even the doll head band out of yarn knit fabric scraps. For the knot version, you wouldn’t even need elastic! On my DIY list.

Khenemet
Khenemet

February 26, 2016

Love the knotted hairband. Thank you for sharing.

Laura C
Laura C

February 21, 2015

How Cute !! Love the “nice touch” style tutorials.

Kathi Martin
Kathi Martin

August 04, 2013

How cool! Love your ideas! Can’t wait to try it. Thanks

Irishdancer
Irishdancer

July 26, 2013

Awesome

Gramma
Gramma

July 22, 2013

love this headband. I need to make it for my grandaughters and their dolls.

Joey
Joey

July 22, 2013

What a great idea. Thanks for sharing this tutorial. Can’t wait to make some for my dolls!!

lisa luft
lisa luft

July 21, 2013

Thankyou! These headbands look so awesome,I can’t wait 2 make them,+ u did a terrifrc job explaning the directions too! And it was free,WOW Lisa

Ipodgrannie
Ipodgrannie

July 21, 2013

Great Idea, especially for an American girl party.

Janet
Janet

July 15, 2013

Really simple and cute. Thank you!

Denise
Denise

July 14, 2013

Great tutorial – thanks for sharing!

Karen
Karen

July 14, 2013

Thanks for the very clear directions. I will be making matching headbands for my doll outfits!

Beaj
Beaj

July 13, 2013

Just cuteness, and easy to do. Thanks..:)

Joan
Joan

July 13, 2013

Super Fantastic. I am all over this project. Love that you can coordinate with any outfit that you create. Thanks!!!!!

Leave a comment