
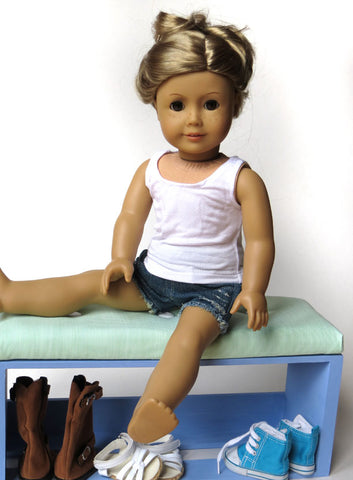
How fun is this? And what doll couldn't use a nice bench to round out her furniture setup? Wondering where the shorts are from - Liberty Jane, of course! Be sure to check out all the cute clothing over at our store - www.shoplibertyjane.com
I used a wooden crate from my local craft store -- it was meant to hold CDs, but the size works perfectly for dolls (mine is about 15" x 5" x 6"). You could do this with any box the right size, though. If you want to paint your crate, do it now -- that way it has plenty of time to dry while you make the upholstered section.

Measure the top of your crate, and cut the cardboard and upholstery foam the same size. I used two pieces of 1/2" thick foam -- it's easier to cut than the 1" foam, and usually runs cheaper anyway. Then, cut your top fabric to be at least 2-3" larger on all sides than the cardboard. Mine was a little thin for upholstering, so I backed it with a piece of sturdier fabric.
Lay the foam on top of the cardboard, lining up the edges; tack them together with a couple dots of hot glue if they're slipping around on you. Lay your fabric down, wrong side up, and lay the cardboard/foam combo on the middle of it, cardboard-side up. Fold the short ends of the fabric over the cardboard loosely.

Thread your needle with a long piece of doubled heavy-duty thread. Starting at the middle of the short ends, anchor your thread and then stitch back and forth across the length of the upholstery. Pull it tight evenly as you go, and work up and down from the middle.
Once that's done, tie off your thread. Clip the corners, as shown below, then fold the long edges over to form a nice miter; pin to secure. If you're not sure how much to clip off, go easy at first; you can always trim more later if you need to!
Anchoring your thread as before, stitch across the width of the upholstery, pulling smoothly tight as you go. Start in the middle and work to one end, being sure to take a couple little extra stitches to secure the mitered fold. Then, tie off your thread, start in the middle again, and stitch to the other end.

Now it's time to tuft! On the back of the upholstery, mark three evenly-spaced dots. Rethread your needle. Leaving a long-ish thread tail, stitch up through the upholstery at one of the dots, through a shank button, and back down near where you came up. Now, on the back side, run each end of the thread through a different hole of a flat button. Pull the thread tight, until the shank button sinks into the foam as much as you'd like, and tie off the thread. The flat button should act like an anchor for your knot.

Because my crate had slats (and hence open spaces) along what would be the seat, I cut a strip of felt to cover all my stitching & then hot-glued it down. Now, with the upholstery done, glue the cardboard assembly to your crate. Voila!


Now, all that's left is to have fun putting it to work. It would be super cute in an entryway -- add some hooks above for coats, and stash shoes and backpacks beneath... or turn it into a makeshift couch in a living room, with some doll-sized coffee-table books beneath, or.... the options are endless!
Happy crafting....
--Melinda, for Pixie Faire
15 Comments
Leave a comment


Chloe Noller
March 10, 2016
This is such a cute idea! I have to make this! It looks so professional and looks so much like the set at American Girl!
Chloe