
Follow along as Craig from Sharp Dressed Dolls shows us how to perform the diamond and bow hand shadow work embroidery featured on his Marlene Dress. This is a great way to add an heirloom embellishment to any of your doll or child's clothes.

Let's get started...
Step 1. Starch the right side of the fabric and allow to dry and press. Repeat this step four to five times.
The starch will act as a barrier between the fabric and the drawn design, making the lead pencil marking easy to wash away. Shadow work is best worked on light weight, sheer fabrics such as Swiss batiste or handkerchief linen.
Step 2. Trace the shadow work design on the starched right side of the fabric with a fine point lead pencil.
Step 3. Cut a piece of embroidery floss approximately 18 - 25 inches long. Separate the strands of floss. Thread one strand of floss through your favorite shadow work needle. I suggest using a 10 sharp or a 26 tapestry needle.
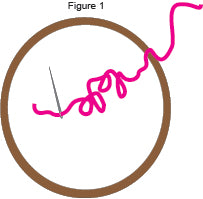
Step 4. On a flat surface lay the threaded needle over the inner hoop ring. Leave three inches of the tail thread outside of the hoop ring, figure 1.
Step 5. Place the traced fabric over the thread and inner hoop ring with the design area inside the hoop, figure 2.
Step 6. Place the outer hoop ring over the fabric and thread. Tighten the hoop to secure the fabric and thread, figure 3.


Step 7. Bring the needle to the right side of the fabric at the beginning point (A), figure 4.
Step 8. To make the first stitch, take the needle down at point (B) to the wrong side of the fabric, figure 4.
Step 9. Move to the opposite side of the design and bring the needle up at (C) and back down at (B), figure 5. Pull gently.
Step 10. Bring the needle up from the backside at (D) and back down at (A), figure 6.
Step 11. Move down to the other side and come up through (E) and go back down at (C), figure 7.
Step 12. Move to the other side and come up at (F) and back down at (D), figure 8.


Step 13. Move to the other side and come up through (E) and down at (C) figure 9.
Step 14. When you come to large curve, make your stitches on outside (on the largest part of the curve) longer. Make the stitches on inside of the curve shorter. You may find it necessary to go in one hole twice on the inside area. Finish the design according to, figures 9 - 20.


Step 15. After you have finished with a design or with the amount of floss you have in your needle, weave that end into the back of the design. Re-thread the needle with the remaining end, and weave this end into the work as well, figure 21.


Hand Embroidery Shadow Work
Front

Back


Happy embroidering!
Craig and the Pixie Faire Team
7 Comments
Leave a comment


Marty
April 25, 2020
Great tutorial! Very easy to follow! thank you!