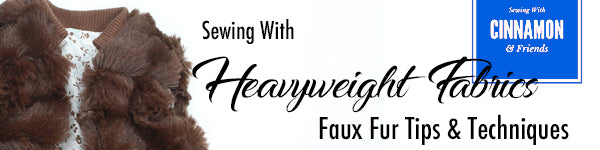
Hi Everyone! In part 4 we wrap up the topic looking at sewing with Faux Fur! The best part about this fabric is that you can make something relatively simple become a true statement piece! The idea of sewing with faux fur may be intimidating, but it's actually fairly easy to sew with and doesn't require you to purchase special tools. There are a few techniques tips that I'm going to share and a bunch of practical tips in the post below. I'm confident that if you take the time to follow along and practice, you will have the confidence to sew with faux fur too!
Are you ready? Let's go...
Tips For Sewing With Faux Fur:
- Choose a basic pattern design. Let your fabric be the star, Intricate details would be lost in the fur pile. A simple design with just a few seams works best! No gathers, princess seams, or yokes! Stright line seams work best.
- Zippers and buttonholes may prove to be challenging - especially buttonholes! If possible leave them off or substitute with fur hook, ribbon ties, or button loop toggle style closures.
- Be prepared for a "fur explosion"! A lint roller, painters tape, garbage can, and large plastic bags or dropcloths are good to have on hand.
- Cut faux fur from the wrong side of the fabric. Use a marking tool or tailors chalk to outline your piece in one single layer (do not fold the fabric for double thickness).
- Cut through just the fabric backing being careful not to trim down the fur pile. The "pile" is the length of the fur itself. Use sharp fabric scissors, a rotary cutter is not recommended.
- Pay attention to the nap or direction of the fur. Cut all piece so the nap is going in the same direction. You may want to draw an arrow on the back side of the fabric to keep track of the direction when cutting your pieces!
- Shake the pieces outside or over a garbage can to remove most of the loose fur before taking it over to your machine. This will help to keep your machine clean, especially on the inside!
- You can sew faux fur with a standard machine and a standard presser foot. Just run a test strip through to see if you need to adjust your stitch length or replace your needle. I've sewn with a universal 90/14 needle and it works great. Just be sure to have a fresh sharp needle on hand because it may dull quickly depending on the thickness and roughness of the fabric backing.
- Tuck the fur into the seam as you pin. The fur should point in towards the garment and not extend out into the seam allowance.
- If your fur is especially slippery, pin an inch or two away from the seamline to keep the fabric from shifting while you sew.
- After the seam is sewn, you can use a nail, bamboo skewer, knitting needle, or pencil to carefully fluff the fabric out from the seam line if needed.
- If you choose a thicker fur you may want to use the butted seam technique (illustrated in the video). When using this technique you may want to straighten a curved side seam before cutting out the pieces. This will be easier to line up and sew. It will not change the overall look too much being that fur is fluffy anyway.
- Leave enough time to clean up after your project is finished! Like I mentioned cut fur has a tendency to get everywhere, floating around the room.
In the video posted below, I share with you an overview supplies and tools I recommend, share sewing tips, and demonstrate several specific techniques using the faux fur fabric.
Pattern Overview:
Liberty Jane Bomber Jacket
Liberty Jane Aviator Jacket


Resources:
Depending on where you live, some types of fabrics may be easier to find than others. For doll size projects you can also check discount stores for items that can be repurposed, like a blanket or scarf! If you like to shop online, check out these sources for fauw fur fabric:
Week One task:
- Now it's time to practice! If this is your first try with faux fur, I'd suggest something simple like a basic vest. You can make one using the LJ T-Shirt pattern, just make it backward so it opens in the front. You can see an example of this idea in the post for the Swimsuit Cover Up Pattern Hack. The brown vest pictured in the video was made using that basic pattern, we just lined it and added a hood (from a pattern like the Ruched Hoodie) and added fur trim into the seamline of the hood.
Bomber / Vest Pattern Hack:
Curious how I turned the Bomber Jacket into a vest? I simply used the pattern pieces for the Jacket Back Lining and Jacket Front modified a few of the steps outlined below and I had a cute fur vest!
- Start by creating a flat Jacket Back Lining piece (not cut on the fold). Cut Jacket Back Lining PIece (no yoke) and Jacket Front out of both fur and lining.
- Cut ribbing for neck and waistband.
- Sew shoulder seams and side seams of both the fur and lining pieces.

- We've decided to eliminate the front placket and zipper from this design, so we need to finish the ends of the ribbing before attaching them to the neckline and waistline. With right sides together, fold the ribbing pieces in half lengthwise. Sew a straight seam along both short ends. Trim and turn ribbing right side out.


- Place the ribbing along the neckline, being careful to line up the finished end 1/4" in from the CF. This will allow us to sew the center front seam and keep the ribbing free to flip up above the seamline when turned right side out.
- Repeat this for the waistline seam.

- With right sides together and ribbing in towards the garment, place the lining on top of the fur. Straight stitch around the perimeter edge leaving a space along the waistline open to turn the garment right side out. Do not sew the armcyes.


- Trim corners and turn right side out.
- Turn edges under, pin, and hand stitch the arm openings.

- Hand stitch the lining opening at the waistline.

1 Comment
Leave a comment


MILICA
May 01, 2018
Hi Cinnamon,
I have signed up for another year of sewing with you and the ladies who love sewing for 18" dolls. I was wondering if it would be possible to have a new intro pattern and video other than moto pants, maybe offer moto jacket for the second year :) that would be awesome!
Also I would like to be a designer some day of doll clothes and accessories and was wondering how can I do that with you? I noticed that you have few programs but are full now. When will new sign up be available?
thanks,
milica virag