
Hi Everyone! Welcome to the topic - Serger Basics! For this topic, I'm excited to announce that Donna Kinley the designer of the DKinley Designs brand, will be my co-host! As many of you know, I'm not one who regularly uses a serger. I love the look of the finished style, I've just avoided learning all the necessary things to use a serger in my work. I've worked with Donna for several years and have always been impressed with her attention to detail and the quality of her sewn garments. When I asked her if she'd be interested in sharing what she knows on this topic with all of us in the Sewing With Cinnamon community, she jumped at the opportunity! I'm so excited that she is here, there's so much to learn. So without further ado,
Here's more from Donna...
I'm excited to share with you about sergers and how to use them to create professionally finished doll clothes. Over the course of the month, we'll take a look at basic information along with some tips and tricks. We'll take a look at basic various stitches and how to apply them to a project.
We will be using the Sew Urban Savannah Skirt as our sew-along for this topic as it provides several opportunities to try several basic techniques all within one pattern.

The posts will include a lot of information, but rest assured, we will consolidate all of this into a nice & neat PDF that you can download at the end of the month as well.
The topic will be divided into four sessions:
- Part 1: Topic Overview, Getting Started, and Threading The Machine
- Part 2: The Rolled Edge
- Part 3: 3-Thread Overlock
- Part 4: 4-Thread Overlock
-
It's going to be a fun course! Are you ready? Let's go...
What Is a Serger and Why Should I use it?
 Some people think of sergers as troublesome or intimidating. I see them as a great time-saver, much like the microwave in my kitchen. While I may not be able to complete all my cooking tasks in the microwave, it sure does speed up many of them. In the same way, my serger can help me produce a professional looking project in much less time. What’s so special about them? In short, a serger can be used to stitch a seam, trim the excess fabric, and finish the raw edge, all in one step.
Let’s take a look at a serger in general and how it differs from a conventional sewing machine. The first thing you’ll notice is that a serger uses multiple cones of thread and there is no bobbin. Instead of the bobbin, there are loopers.
 A serger is often referred to as an overlock machine. These loopers work together to bring the threads over the cut edge and lock them along the edge of the fabric to prevent fraying. The second difference is the cutting mechanism which trims the fabric just before the stitches are created.
The other main difference is the speed of sewing. The average home sewing machines sew between 650 to 1,000 stitches per minute, whereas the average home serger sews between 1,300 to 1,700 stitches per minute.
If you are thinking about getting a serger, I highly recommend buying from a local shop that provides classes and support. Average prices range from $200 for a basic machine up to several thousand for a machine with all the bells and whistles. Just as with most anything, it is possible to find a good used machine locally or online, but there’s the usual risks of missing parts, mechanical issues, and lack of support. Choose wisely.
If you already have a serger hiding somewhere, pull it out, dust it off, and let’s get to know it better!
Essential Serger Tools and Supplies
The items you will want to have handy are:
-
Machine owner’s manual - (many of these are now available as PDFs online)
-
THREAD - Serger thread comes on cones or large spools and can be found in a large variety of colors. Many people choose to limit their serger thread to just a few neutral colors, especially if it will only be used inside their items. When the serger will be used for visible finished edges, the color of the thread becomes a bit more important. In a small project, large size spools of regular thread can be used; but, in general, the loopers use a lot of thread, so it’s best to use the large cones designed for sergers to lessen the chance of running out of thread in the middle of your project.
-
NEEDLES - Your machine should include a few needles. Most home sergers use the same needles that conventional sewing machines use, but check your manual to be certain. As with regular sewing, needle size should be matched to thread size and type of fabric. Personally, I haven’t found a need to use much other than a size 75/11 or 80/12 universal type needle.
-
THREAD SNIPS - I like to keep a pair of thread snippers at my serger. There is a wide variety of these available. A small pair of scissors would work but take a bit longer to use.
-
LARGE TWEEZERS and NEEDLE AND LOOPER THREADER - These are usually included with the machine and are useful for threading hard to reach areas.
-
LARGE BLUNT POINT NEEDLE - A blunt point needle with an extra large eye can be used for hiding thread tails inside the serged stitches for a cleaner look on corners and to keep stitches from coming loose as there is no backstitching to lock the stitches.
-
OIL - A serger has a lot of moving parts that need to be cleaned and oiled on a regular basis. Check the owner’s manual for details about this for your machine. In general, oiling will be needed in the looper area. Be sure to use a high grade machine oil to keep your serger running smoothly.
-
CLEANING BRUSH - Due to the constant scissor action of the cutting blades, dust and fluff accumulate quickly in and on the machine. Use the brush to remove this while being careful not to pull the threads out of position. A small vacuum tool such as the kind for computers can be used for a more thorough cleaning. The cleaning brush included with my machine has a hole in the handle that is designed to be used as a needle inserter.
-
SCREWDRIVERS - Your machine should have some screwdrivers included as part of the accessories. These are used when changing the needles or, occasionally, the cutting blades.
-
FABRIC SCRAPS - I like to keep a small bin of fabric scraps by my serger. These can be some of the larger pieces that would often get tossed into the trashcan when you are cutting out a project. It’s a good idea to have various weights and types of fabrics handy so you can do your test stitching on a fabric that will be most similar to the fabrics in the project you will be sewing.
SETTING UP YOUR MACHINE
Using your instruction manual as a guide, familiarize yourself with your machine and complete the following:
- Extend the telescoping thread guide to its fullest height.
- Insert the needles if they aren’t already in the machine. Follow the instructions in your manual for your model to do this. On my machine, the manual states to loosen both set screws then insert the right needle first (flat side toward the back) and tighten the right set screw slightly. Then insert the left needle in the same way and tighten both set screws. You’ll notice that the left needle is set a tiny bit higher than the right. (Two needles are needed for the 4 thread overlock stitch. Only one needle is used for 3 thread overlock. One needle only, as well, for a rolled edge hem.)
- Locate the handwheel and check the manual for which direction it is to be turned. I have two sergers that turn “top toward me” like my regular sewing machines, but I have one older serger that turns “top away from me”. Most sergers have an arrow on the side of the machine to indicate direction. If yours does not, you might want to draw arrows with a permanent marker, especially if it goes opposite your sewing machine. Open the looper cover. Turn the handwheel and notice how the looper arms move. If you have a self-threading machine, you may not be able to see the loopers at first and need to open another cover.
- If instructed to do so in the manual, apply a drop of oil to the areas indicated. Turn the handwheel until the needles are fully raised.
- Locate the upper knife. *** NEVER EVER EVER serge over pins *** That will ruin your cutting blade and possibly cause further damage to your machine, not to mention the danger to you! Check your manual to find instructions for disengaging the blade. Practice engaging and disengaging the cutting blades. On my machine, the holder is pushed to the right and then the knob is turned until the blade is raised up and out of the way. On my friend’s serger, the upper blade is pushed out and lowered out of the way.
- Locate the presser foot lift lever. Raise and lower the presser foot.
- Locate the power cord and foot pedal cord. Insert them into the machine as directed, but don’t plug the machine into the electrical outlet yet.
- Locate the items in your accessories that have to do with threading. Anti-vibration cones, spool caps, looper threader, and tweezers. The anti-vibration cones are meant to help stabilize large cones of thread so that they don’t wobble as you sew. They can be turned up or down and adjusted so that they work best for your brand of serger thread. If you are using large regular spools of thread, you’ll want to remove the anti-vibration cones and use the spool caps instead. These caps prevent the thread from catching on the spool itself. When a serger is used for actually stitching a seam, the left needle thread is the one that could possibly be visible from the outside along the seam line. A large regular spool of thread can be used as the needle threads, but be very careful trying to use regular spools for the looper threads. Loopers use a LOT of thread.
- ALWAYS THREAD IN ORDER! *** Many headaches can be avoided by threading in the proper sequence. If a looper thread breaks, you must re-thread completely in the proper sequence or the chain will not form properly.
- We will be using 4 thread overlock, a 3 thread overlock, and a 3 thread rolled edge hem in our sew-along, so check your manual for how those are set up on your machine.
Week One Tasks:
- Watch the “Threading Your Machine” videos posted above. In those videos, I demonstrate step by step how to thread an older manually threaded style serger and get set up to do a 4 thread overlock stitch. Then I do a test stitching, analyze the quality of the stitch, and make changes to tweak the stitch tension. I also demonstrate a short-cut method for thread color change, without having to completely re-thread the machine.
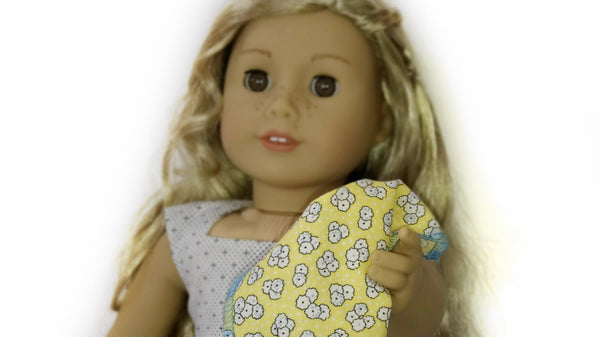
- If you want a quick project to practice on for this week, eliminate the left needle and follow the instructions in your owner’s manual to set your machine for a 3 thread overlock or a 3 thread rolled edge. Serge around a few squares of fabric to create some napkins for your dolls or try serging around the edges on one of the scarf patterns available on Pixie Faire.
Here are a few step-by-step images to complete that project:


12 Comments
Leave a comment


 Some people think of sergers as troublesome or intimidating. I see them as a great time-saver, much like the microwave in my kitchen. While I may not be able to complete all my cooking tasks in the microwave, it sure does speed up many of them. In the same way, my serger can help me produce a professional looking project in much less time. What’s so special about them? In short, a serger can be used to stitch a seam, trim the excess fabric, and finish the raw edge, all in one step.
 A serger is often referred to as an overlock machine. These loopers work together to bring the threads over the cut edge and lock them along the edge of the fabric to prevent fraying. The second difference is the cutting mechanism which trims the fabric just before the stitches are created.


Linda
December 02, 2020
How do I doew load thisclass pdf