


Flossie Potter’s Hip-Hugger Bell Bottoms Pattern Hack
Back in the 1970s, young women used to turn their jeans into maxi skirts by opening the center seams and leg inseams, then re-attaching them in a different configuration. With minor modifications, the Flossie Potter Hip-Hugger Bell Bottoms pattern can replicate this iconic design! Here’s how:
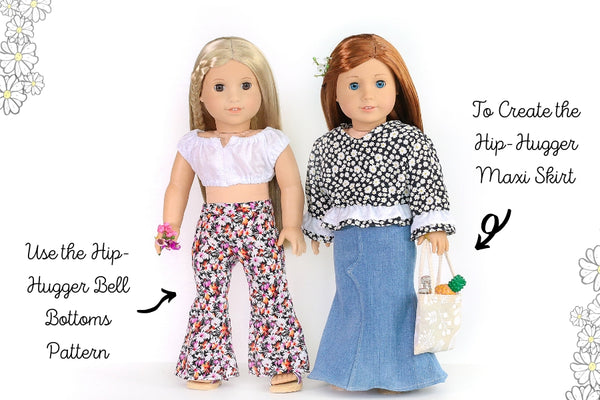
You will need:
- Flossie Potter Hip-Huggers Bell Bottoms pattern pieces:
- Waistband #3A & 3B (cut 2 as in the pattern layout)
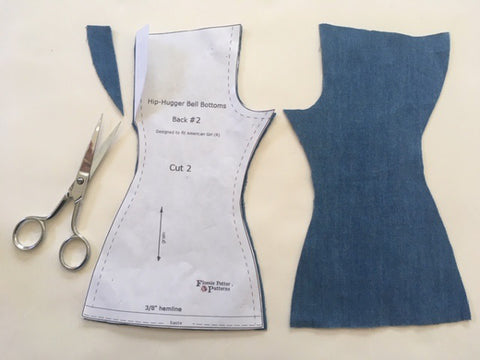
- Back #2 (cut 4, replacing the front piece with a second back piece in the pattern layout)
- Light-weight denim-look fabric
- Hook-and-loop tape
- Narrow twin needle (helpful)
Getting Started
Prepare the waistband (and optional belt loops, if desired) as directed on the pattern in steps 1 - 3. Set aside.
-
Lay the four back pieces on the table in groups of two with wrong sides together and their crotches facing each other. The pieces on top will be considered as the front of the skirt; the pieces underneath will be the back. Remove the placket from both proper right pieces.
-
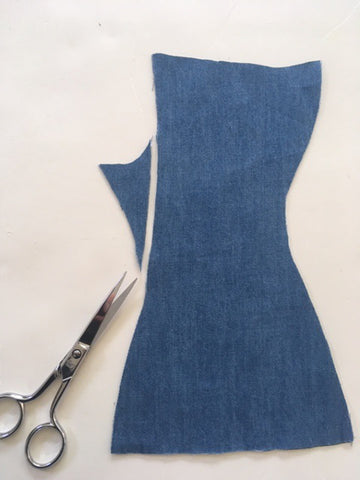
Remove the crotch area on the proper left pieces to smooth the center edge.
-
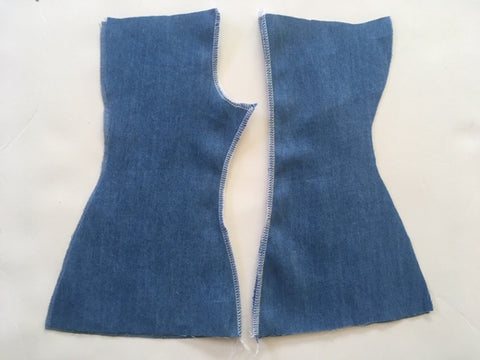
Finish all center edges. Press only the edges with a crotch point 1/4” to the wrong side. Open the pressed edges.
-
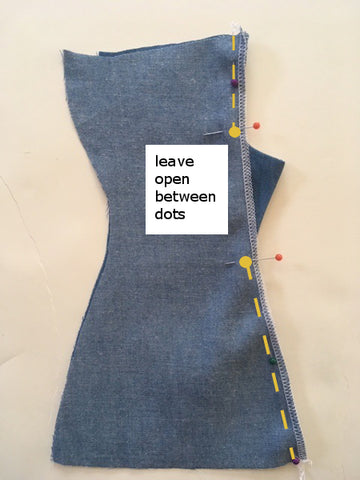
With right sides together sew the center front seam, leaving approximately 2 1/2” unsewn at the curved crotch area, shown with dots in the photo above. Repeat with the center back.
-
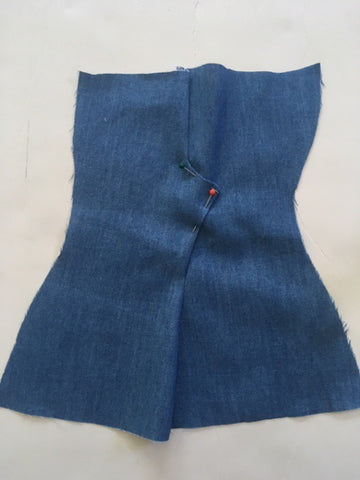
Open up and push the crotch point to the right side of the fabric (the front and back of the skirt will be mirror images of each other). Pin the crotch points in place.
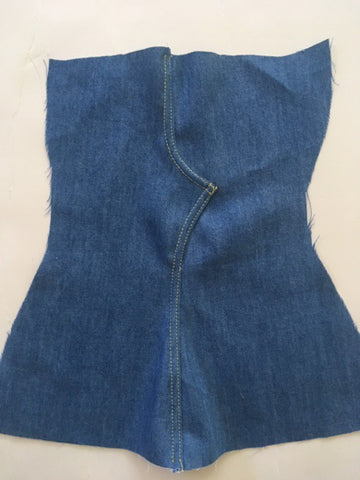
- Sew a double row of top stitches along the seam to catch the finished edges underneath (a narrow twin needle works well).
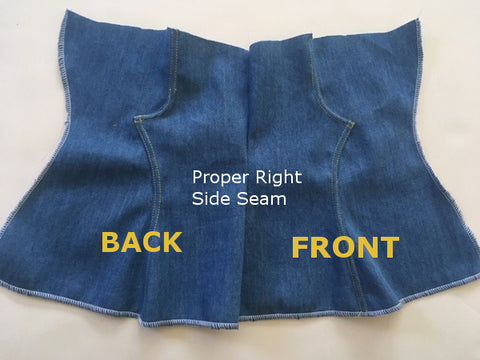
- Finish the proper left side edges (the ones with plackets) on the front and back of the skirt. With right sides together sew the proper right side seams (without plackets), but do not finish the seam allowance, yet. Open up.
NOTE: All dolls’ measurements vary. Pin the skirt on your doll (approximately 3/4” lower than where it will be worn, leaving space above where the waistband will be) to check for proper fitting. Make minor adjustments at the proper right side seam. Finish this edge after adjusting.
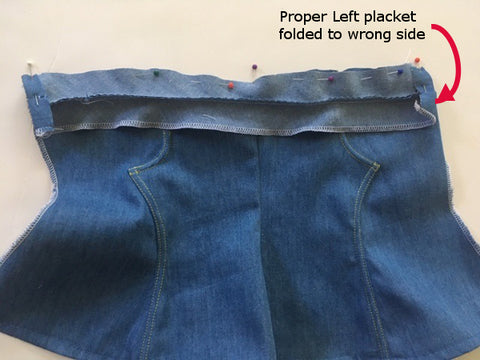
- Press the proper left placket on the skirt front to the wrong side. Attach the waistband as in steps 9 – 16 of the Hip-Hugger Bell Bottoms Pattern. Add hook-and-loop tape as shown in steps 17 – 18. Finish the lower edge of the skirt and sew the hem as in steps 19-20.
Congratulations, You Just Hacked A Pattern Successfully!
Thanks for following along and happy sewing,
Heidi & the PF Team


11 Comments
Wow, spectacular.