


Clipping is one of the simplest, easiest ways to take your sewing up to the next level of professionalism! Sadly, it's often overlooked, or given a very brief explanation. So, today I wanted to show you three professional clipping techniques.
Before we get too far, here's a quick definition: clipping is simply any cut into the seam allowances, resulting in a flatter seam. Now...get your scissors, and let's get clipping!
Lesson 1: Clipping concave curves
This neckline is a great example of a concave curve, or a curve that goes inward. You can also find concave curves in princess seams, facings, and armholes.
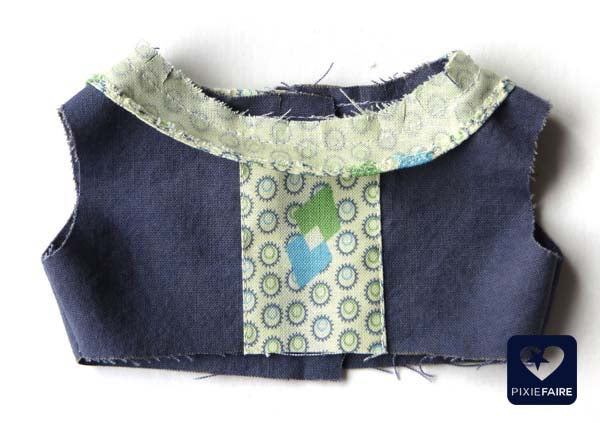
I've sewn a little tiny facing to this neckline. It's not an extreme curve, but you can already tell if I were to just turn it right side out, there would be some serious puckering on the right side. Nothing says sloppy sewing like a puckery seam!

Here, you can see the correct clipping technique for concave curves: tiny little slits, cut in the seam allowance, just up to the seamline (but not past!) The more extreme the curve, the more slits you'll need.
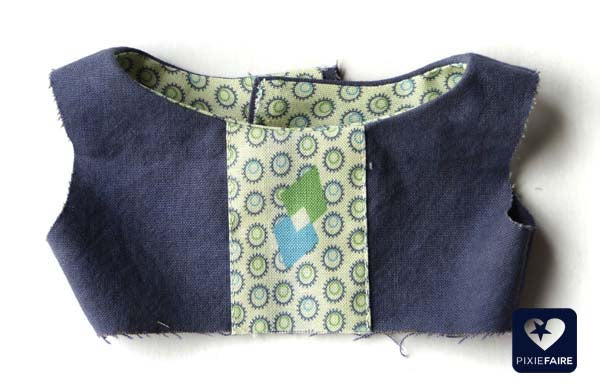
Look at how pretty that clipped, pressed seam is!
Lesson 2: Clipping Convex Curves
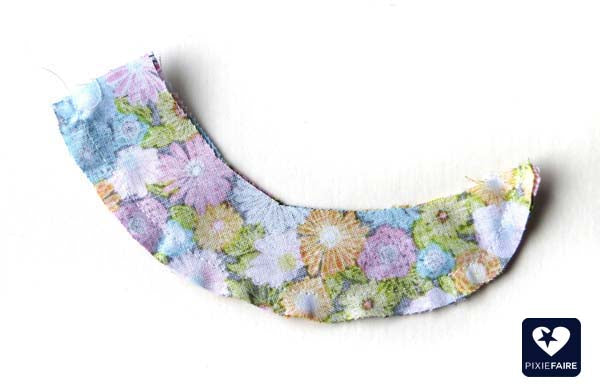
For this example, I've sewn up a little half collar. Its outer edge is a convex curve -- because the seam allowance is wider than the inside of the collar, the seam allowance wants to buckle up on itself.

So, you have to remove some of the seam allowance by cutting little notches. The black triangles below mark good places to clip out notches.

The result? A professional-quality, smooth curve!

Lesson 3: Grading Bulky Seams
Grading is a little different, but it also helps your finished seam lie flatter. Any time you have lots of layers coming together, it's a good idea to cut your seam allowances to differing lengths -- to grade them. Essentially, you want a stair-step look to your seam allowances.

This example shows a two-layer skirt, gathered onto a bodice piece, with a binding strip! That's four layers, and some of them are even gathered... Trimming them to different lengths will keep the seam from becoming a lump in your garment, while still preserving the strength of the seam.
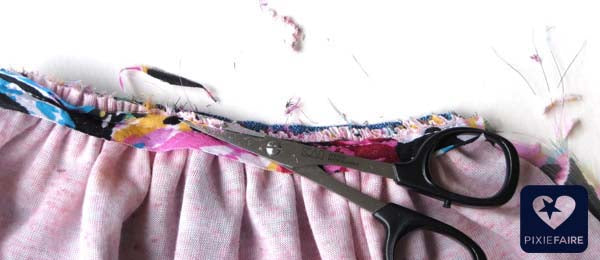
To grade all the layers at once, turn your scissors at an angle; clip the top seam allowance rather short (leave just enough that it won't pull out of the seam), then clip the next layers a bit taller, and leave the lowest layer longest of all.

Now, when you press and stitch the binding up, you have a much less bulky seam. (And yes, it can be just as sturdy as if you'd left on all the seam allowance!)
Congratulations! You've finished Clipping 101!
Have you been clipping for years? Or is this all new to you? I'd love to hear about your adventures in clipping, in the comments...
--Melinda


35 Comments
If you’re careful you can use pinking shears for outside curves.
Thanks. Good advice.
How about just cutting the seam allowance in half? I believe Nancy Zieman teaches this, and that’s what I like to do many times. If I want the seams pressed open, then I would clip.
Thanks for the tutorial.
I too have been clipping for years but am very impressed by the step method of reducing bulky seams. Very useful tutorial.
I have been clipping for years and this is a good tutorial. There are no shortcuts to clipping. Once you start clipping and grading bulky seams you just won’t quit…the results are too important to the finished garment whether for a doll or yourself.