

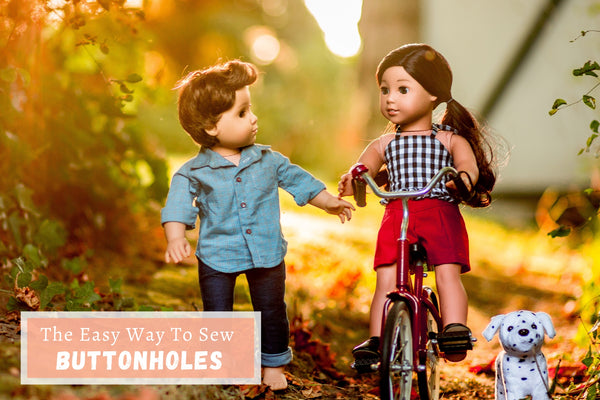
This week we have a fun treat! Shari Fuller, the designer behind the Thimbles and Acorns brand, is going to share her amazingly cool buttonhole sewing tip with us! After trying this, I'm pretty sure you'll never go back to your old method - seriously! My hope is that you will walk away with the confidence to sew professional looking buttonholes!
Limited Time Giveaway! We're giving away a $50 Pixie Faire Gift Card!
To enter the giveaway, be sure to scroll to the end of this post and leave a comment. Tell us- would you rather sew buttons and buttonholes or sew a zipper?
But first... If you're new to sewing buttonholes with an automatic buttonhole foot attachment on your sewing machine, be sure to check out my Simple Closures Video from the Sewing Academy series, it includes a full tutorial showing how to install and use a button hole foot. I also demonstrate how to open up the buttonhole successfully without accidentally cutting through the threads.
Now on to the tutorial from Shari Fuller!
Watch the Freezer Paper Buttonhole video below:
Or follow along with the full tutorial here:
For many sewers, the thought of adding buttonholes to a finished outfit is enough to send chills down their spine… it does for me. The thing is, it isn’t terribly difficult to make buttonholes, especially if your machine has a one-step buttonhole feature. The problem is more about placement. A slightly crooked or offset buttonhole can ruin the finished look of an otherwise masterfully sewn outfit… and it is nearly impossible to remove a buttonhole without damaging the fabric.
The key to beautiful buttonholes is to carefully mark all your placement lines so you can get them right the first time. Transferring markings directly onto fabric, however, isn’t always as easy as it seems… which is probably why we are tempted to take shortcuts we inevitably regret. Markings can be difficult to see on dark or printed fabrics, and it can be difficult to remove markings from lighter fabrics. This is where the freezer paper comes in, the white paper is easy to write on and easy to see, and when you are finished, you just peel it off without a trace!

To begin, gather your project, freezer paper, buttonhole foot, pen, ruler, scissors, rotary cutter (optional), and an iron.
1. Measure the width of your buttonhole foot.

2. Cut a strip of freezer paper the same width as your buttonhole foot.

3. Draw a line down the center of the strip of freezer paper.

4. On a scrap piece of fabric, make a sample buttonhole that fits the buttons you will be using in your project.

5. Measure the length of your sample buttonhole.

6. Using the measurement of your sample buttonhole, determine the buttonhole placement on your project and transfer the placement marking to the center line on your strip of freezer paper. The top of the strip should line up with the top edge of your project. Don’t forget to figure in the seam allowance when determining the placement of the first buttonhole.
Tip: For doll clothes, I like the top button to be 1/4-inch from the finished edge, so the marking for the top buttonhole should be 1/2-inch from the top of the freezer paper to allow for the 1/4-inch seam allowance.


7. Fold the freezer paper strip in half along the center line. Trim the excess length of the bottom, leaving about 3-inches to help center the template under the buttonhole foot.

8. Snip the ends of each buttonhole marking 1/8-inch in from the folded edge…

… then snip out the center of each buttonhole.

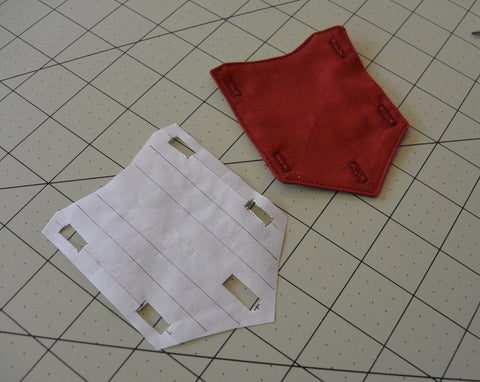
Your finished template will look like this.

9. With the plastic side down, position the freezer paper template on you project. The top edge of the template should match the top edge of the project. Use the center line of the freezer paper to help with the alignment. Press the freezer paper so that it adheres to your project.

If you are unsatisfied with the alignment, simply peel the freezer paper up, reposition it, and press it in place again.

10. Starting with the bottom buttonhole, position the template so that the needle lands at the bottom edge of the buttonhole opening. Adjust the template so that the side edges are aligned with your buttonhole foot and the center line runs down the center of the buttonhole foot. Stitch your buttonhole. Repeat this process for the rest of the buttonhole, working from the bottom up.

When you are finished, peel the freezer paper template from your project. If you are careful not to tear it, you can reuse this template several times.

Look, beautiful, straight, and even buttonholes! (…though, I wouldn’t suggest using white thread on read fabric)
While this tutorial demonstrates how to make a template for simple vertical buttonholes, the concept can also be used for horizontal and arbitrarily placed buttonholes as well. Instead of cutting a strip the same width as your buttonhole foot, cut a wider strip or template that will accommodate the buttonhole placement and draw guidelines on the freezer paper for your buttonhole foot.
Thanks, Shari! This is a fantastic resource!
Applying this method can help you approach sewing patterns with functioning buttons with confidence! Be sure to check out our Buttons and Bows Collection to see more patterns where you can apply your new buttonhole skills!
ENTER TO WIN A $50 Pixie Faire Gift Card!
To enter this week's contest, simply click the link below and then enter through the giveaway widget at the bottom of the blog post, there are many things you can do to earn multiple entry points!
Contest Details: You enter through the entry form that is embedded on this page and appears just below this paragraph, if you don't see it, be sure to visit the page from your desktop or an alternate browser such as Google Chrome. It may not appear on all mobile devices. The complete rules and entry details appear on the entry form. This is not a comment contest - in other words, leaving a comment on the bottom of this page is not an official entry method. The only required entry method is to leave a comment under this post and then confirm that you did it in the contest widget. One person will receive the PF Gift Card. You can enter once, or gain multiple entries by completing the other entry methods and increase your chances of winning. Please review all Terms and Conditions on the giveaway page before entering. While we wish we could run this contest everywhere, for legal reasons it is only open to eligible residents of the U.S. and Canada, not including Rhode Island. This contest is exclusively endorsed by Liberty Jane Clothing and Pixie Faire.
We'd love to hear from you. Leave a comment and tell us -would you rather sew buttons and buttonholes or sew a zipper? Commenting below and confirming your entry in the widget above gives you one entry method, the other methods are listed in the widget above, be sure to enter in as many ways as you can to receive the maximum amount of entries to win one PF Gift Card!
Thanks, everyone!
The Pixie Faire Team


433 Comments
I prefer zippers. My machine does not make button holes.
I can"t do either but it is time to learn!
If I had to choose, I’d pick buttonholes as my machine is pretty easy. But honestly, for doll clothes velcro is the way to go.
Love the buttonhole tutorials
I have trouble with getting the right scale on buttonholes so I usually go with velcro with button sewn on top to look like a buttoned closure.